
If you stay up to date on the trends in the custom decorating world then I am sure you’ve seen the latest trend of stacked words. We love how it makes your words pop up off of the shirt!
There are a few ways to create the look, you can purchase a font that does it for you. Or you can make it yourself in just a few steps! It’s much simpler then it looks, so follow along below with our step by step tutorial. 
You Will Need:
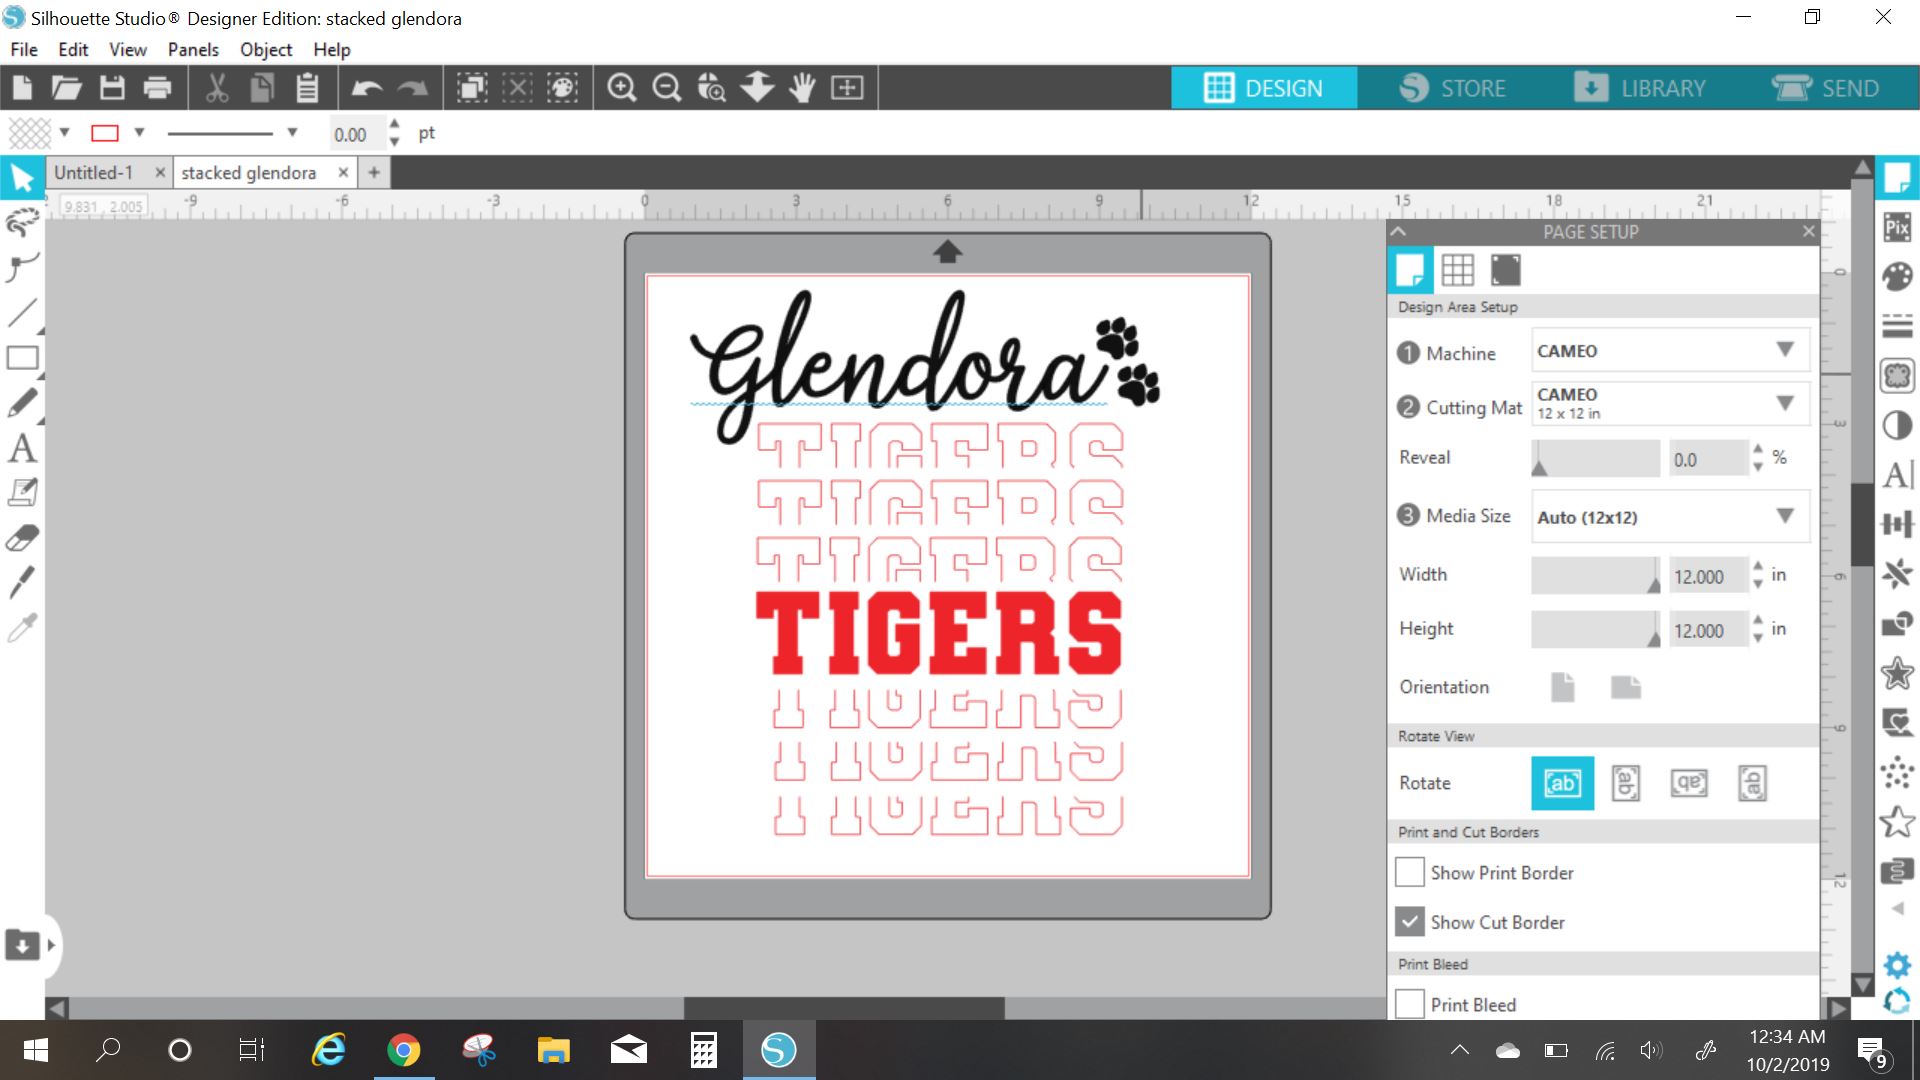
Here’s how to create your design with the Silhouette Program:
Step 1 – Open your design software and write a word.

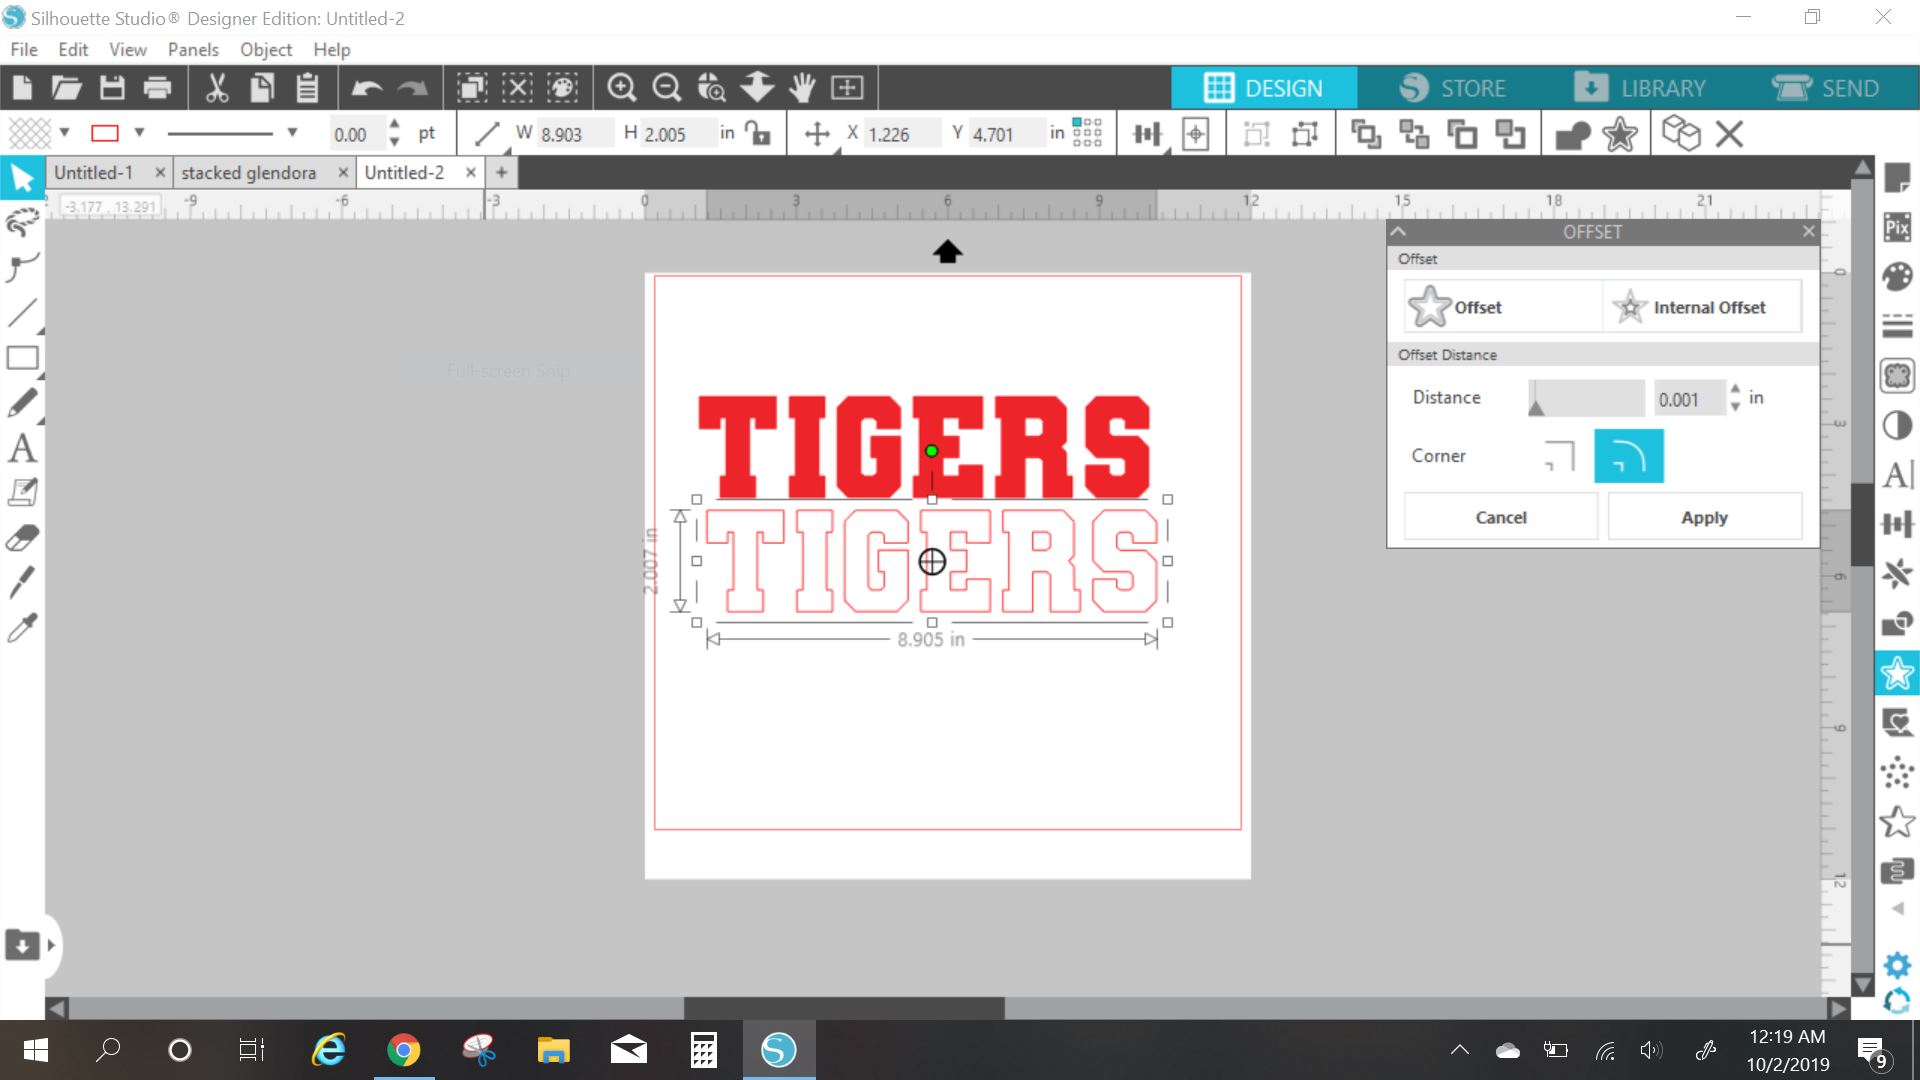
Step 2 – Offset the text by .001.

Step 3 – Offset that text again by .001.
Step 4 – Move your original text out of the way and make the other two a compound path.
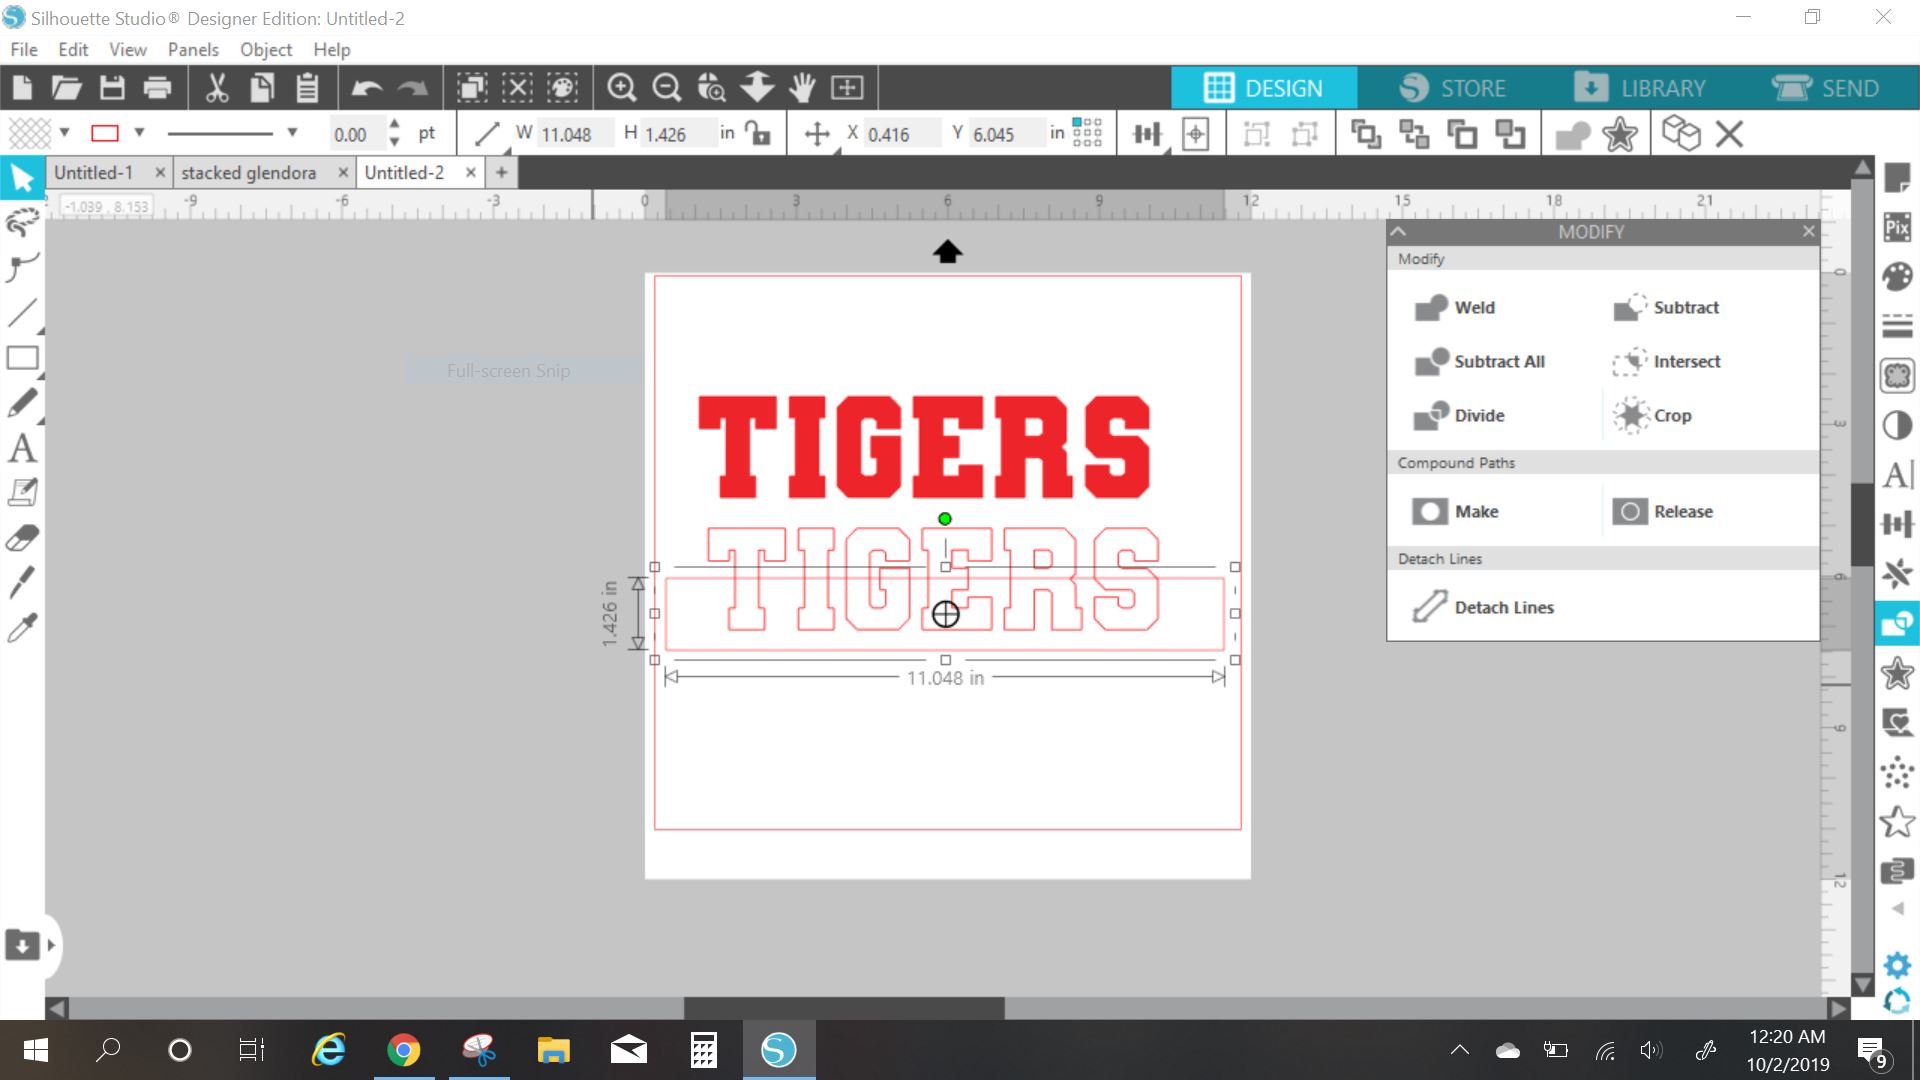
Steph 5 – Grab your rectangle and make it cover half of the word, then use the subtract option to cut it in half.
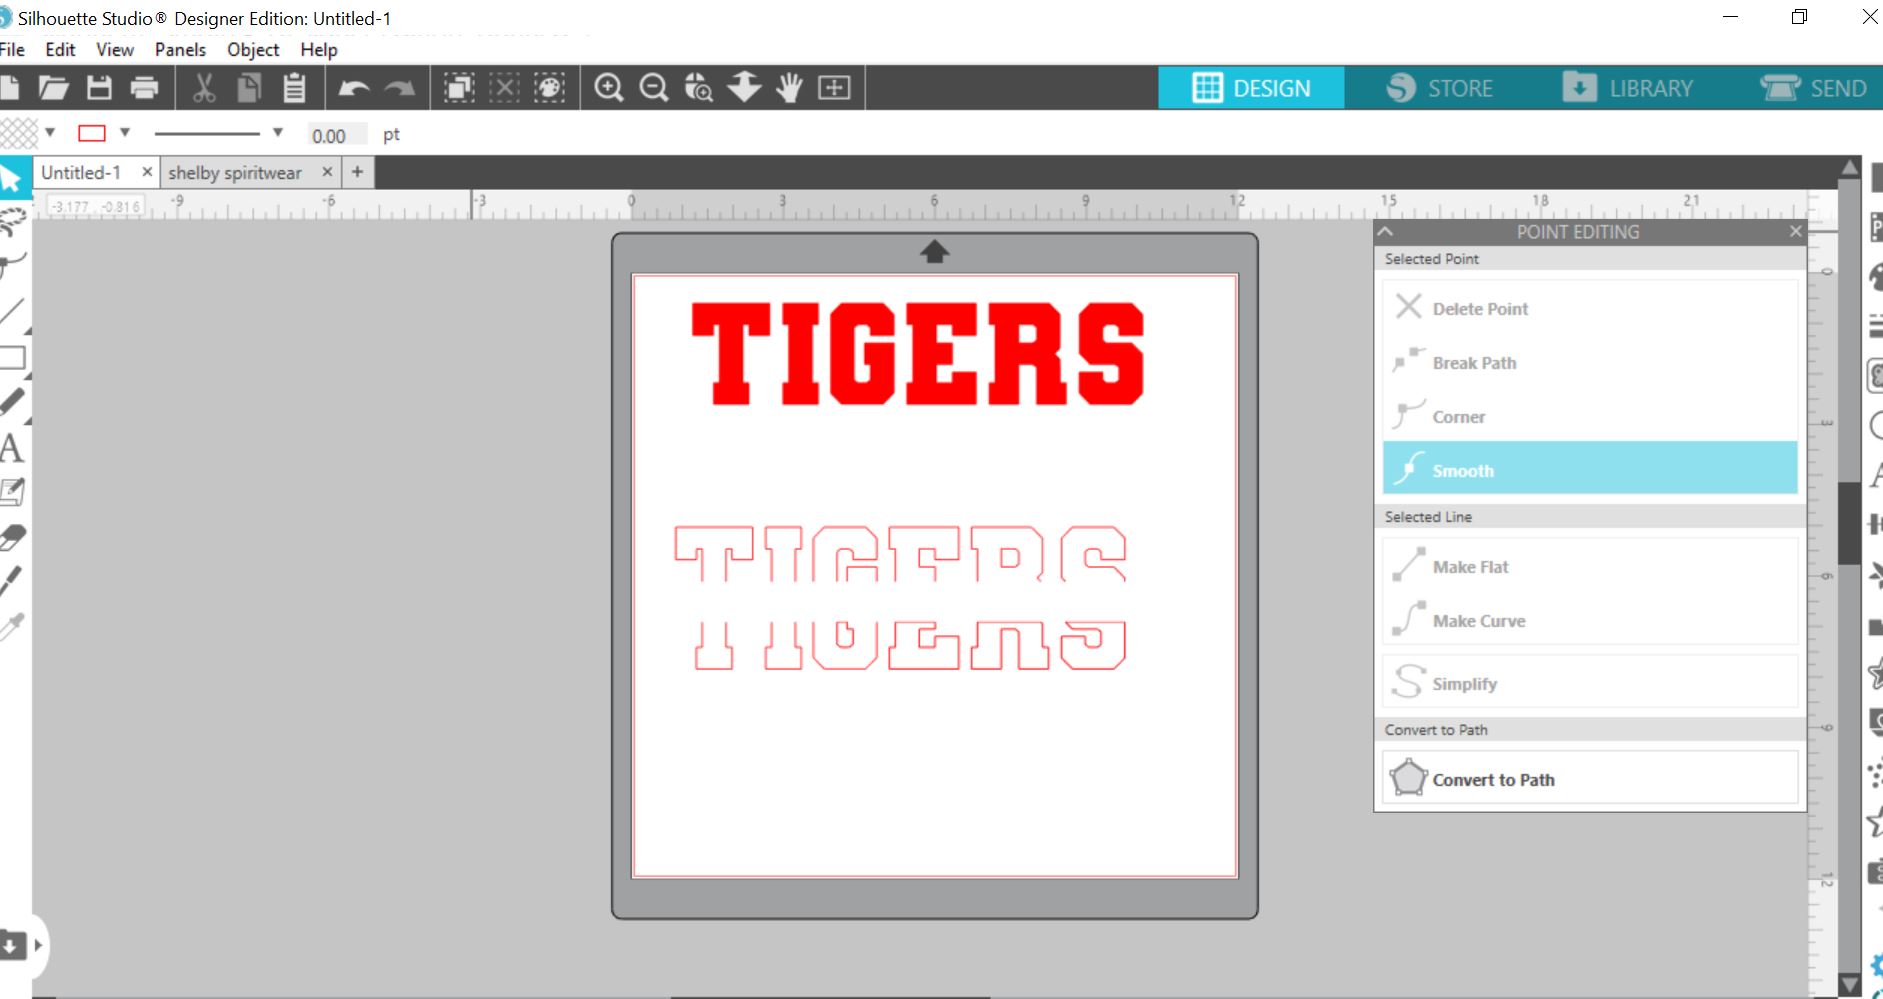
Step 6 – Pull your word apart and you will notice little lines on the bottom of the words, delete them. Just make sure not to delete a text layer!
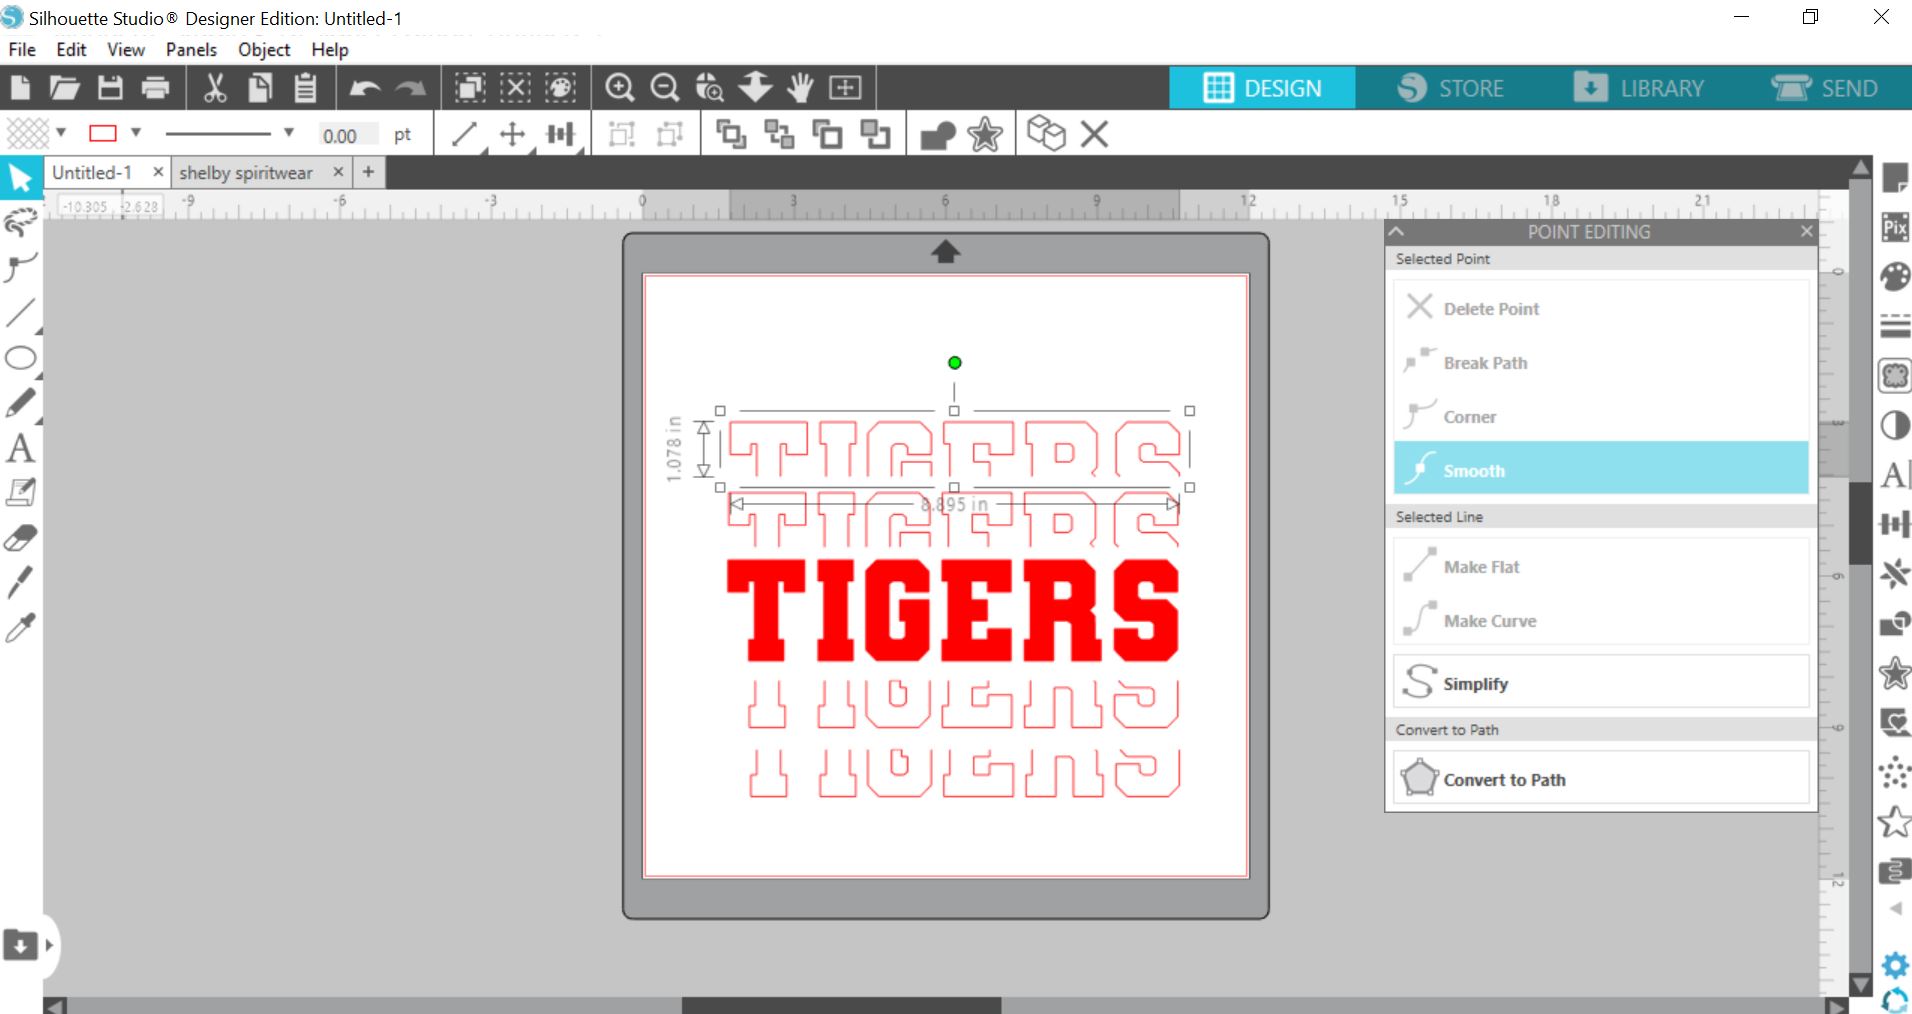
Step 7 – Line up your words and duplicate…duplicate…duplicate…and duplicate… as many times as you want!
Step 8 – You can stop there or you can have some fun with it. Add a complimentary font or image to the top.
Step 9 – Send to your machine, cut, then press!
Have you made one? Let us see! Tag us on instagram at @proworldinc #proworldinc