When ordering custom transfers, you will want to make sure that you are choosing the right size for your design when filling out our quote form. We get questions from our customers all the time asking for help on sizing, so we hope that today’s post is helpful.

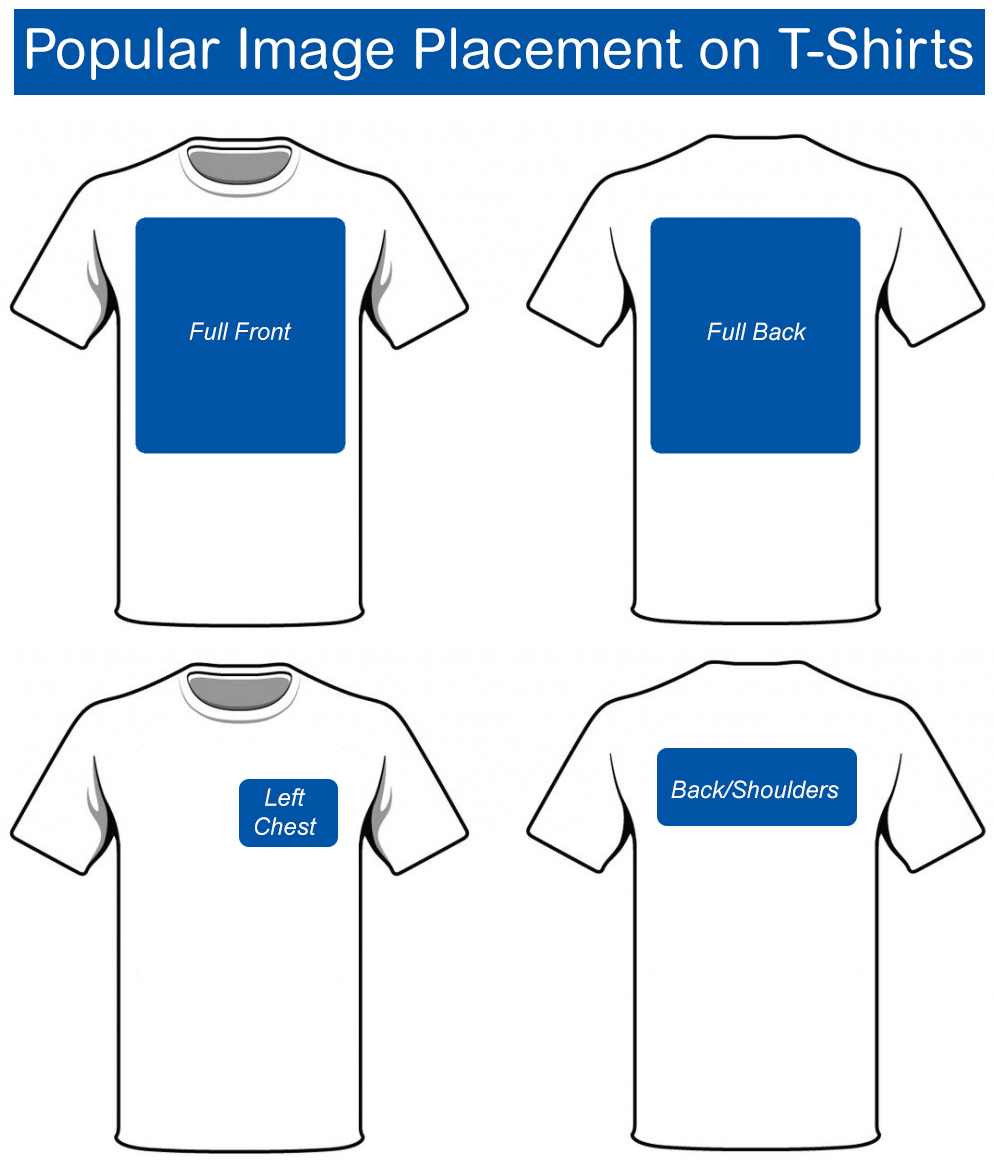
The best way to know what size will work, is to measure the printable area of the garment(s) you will be pressing on. If you will be printing on a variety of sizes (lets say from toddler to adult XL), then you obviously may need two different size transfers printed. However, it is always best to try and print just one size for all of your transfers, to be able to gain the most value out of our gang sheets and to save money.
We always recommend taking a ruler to measure the printable area on the smallest garment first. Find out how much room you have to work with, and plan on making that entire area your transfer size. Let’s say your printable area is 9×9″ for a full back design you want to create. Now you will want to measure out a 9×9″ area on your biggest garment to make sure that this size will take up enough room. If it works on the smallest and largest garment, it will work on all sizes in between.
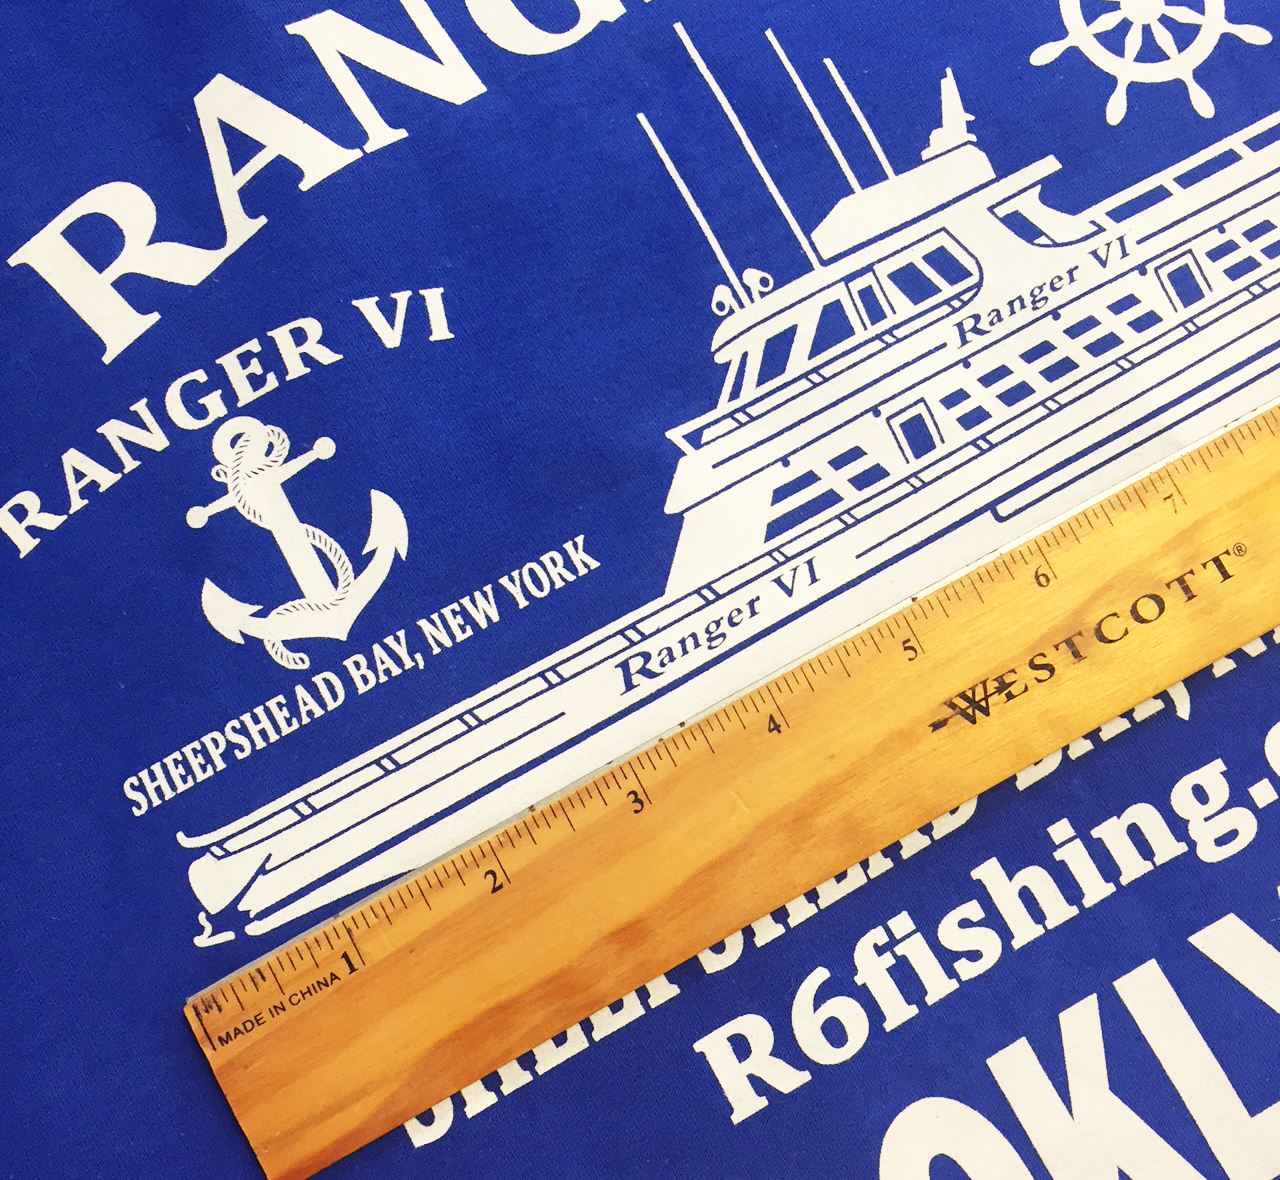
 Our sizes are proportional based on width. For example, if you upload the above design and request a size of 11×11″, we will enter the width at 11″ and let the design scale out proportionately. As you can see, the above design would be only 4″ tall instead of 11″ – due to the shape of the artwork. It is much wider than it is tall.
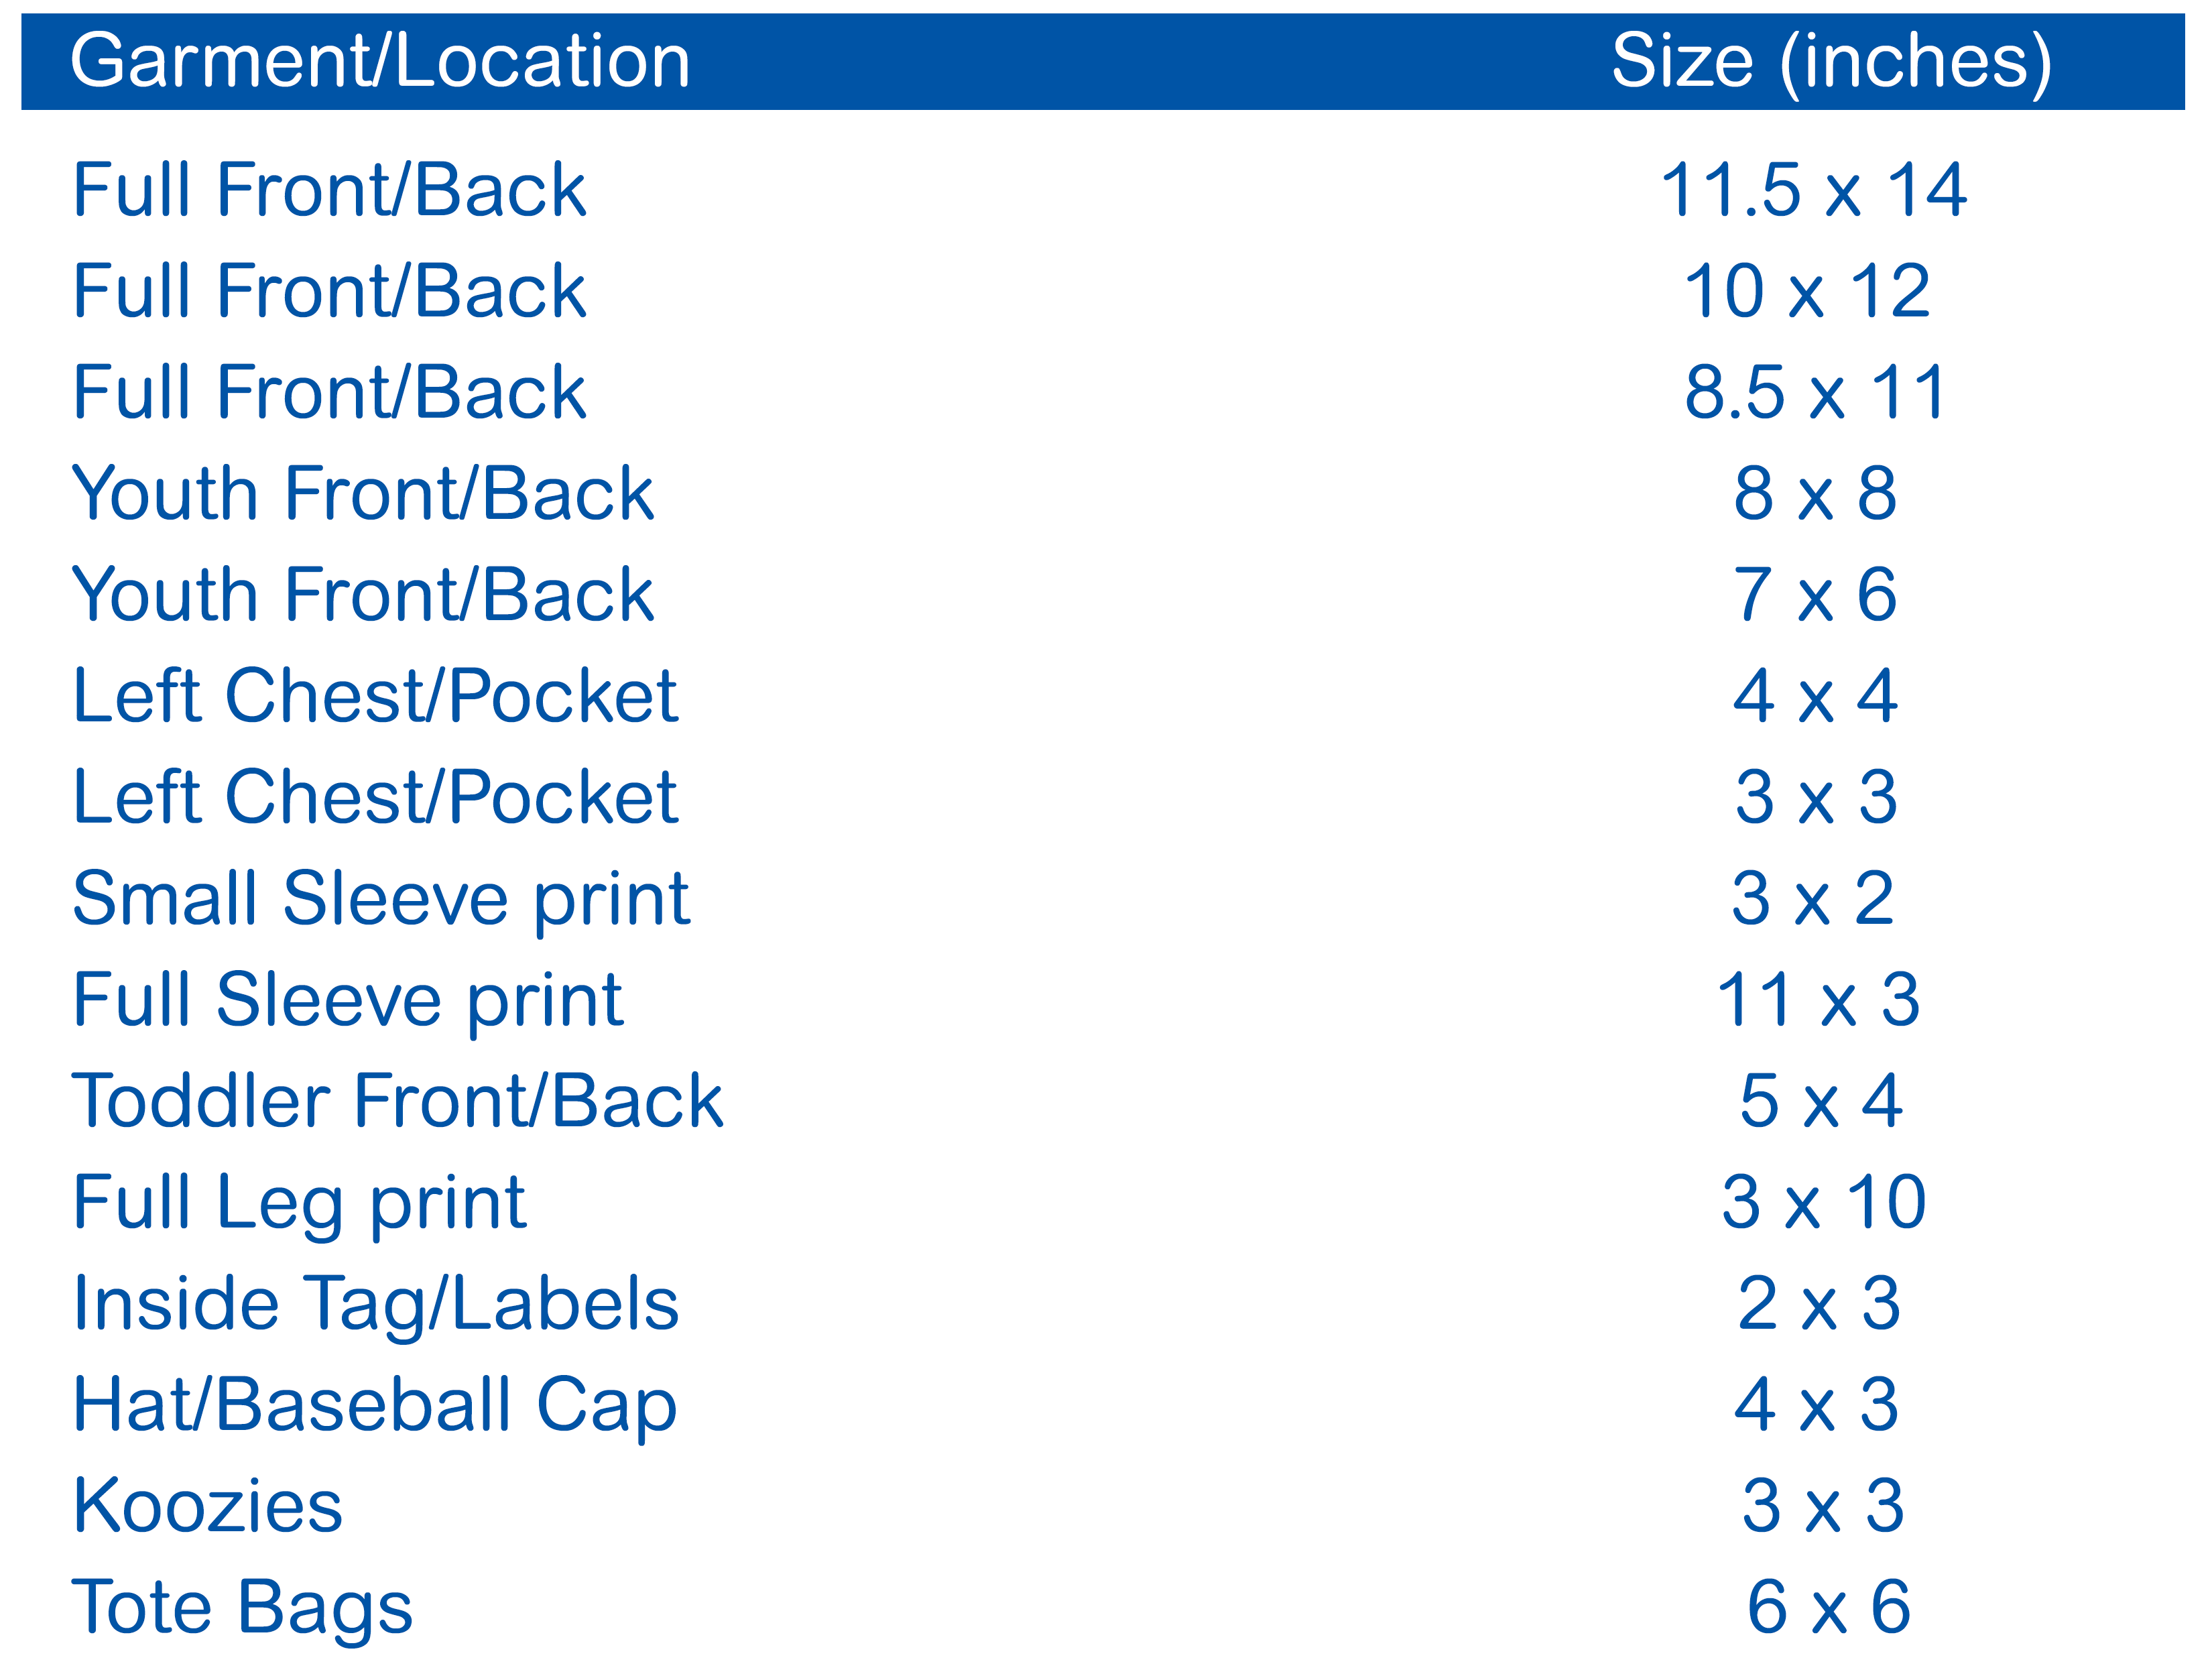
The following table will provide some guidance on suggested transfer sizes for different types of garments, and different printing areas.
*Keep in mind that your design may not be proportionate at any of these exact sizes. This is only to be used as a starting point. You will always want to measure your garments to ensure the size(s) that you choose will fit properly.


