
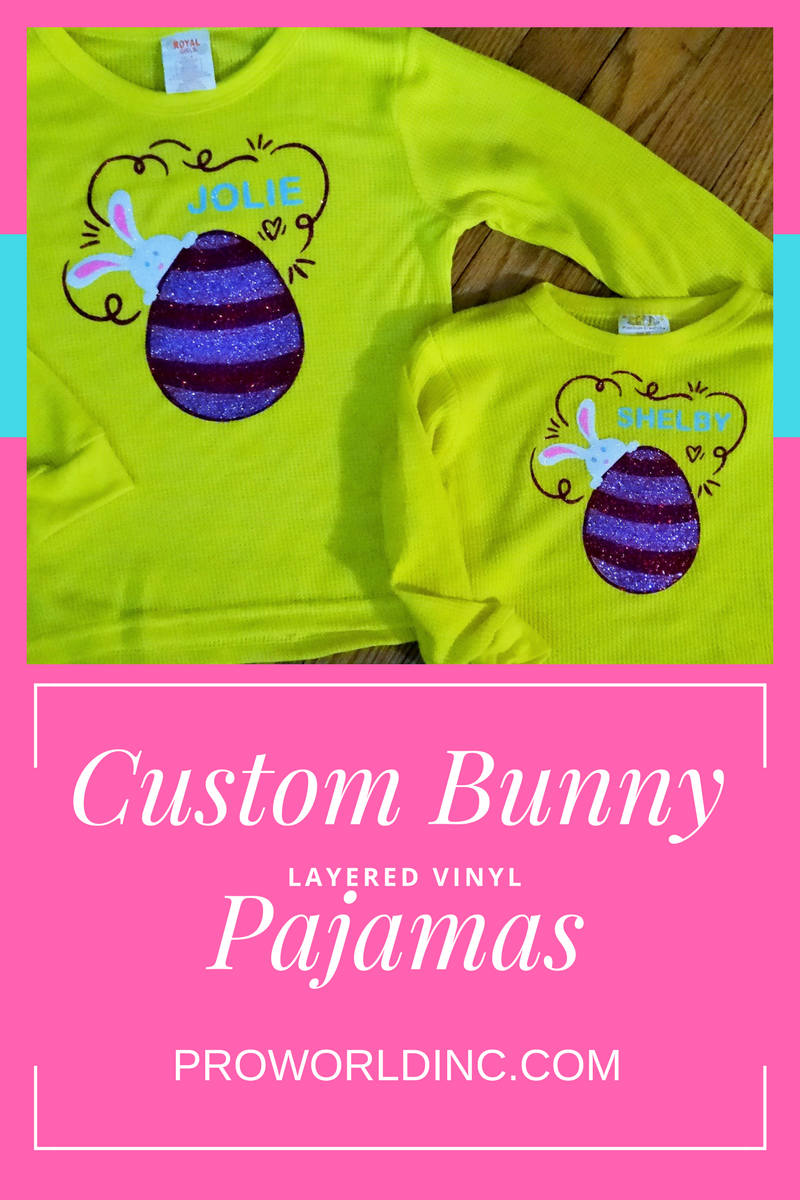
For today’s post, we decided to create a pair of customized Easter pajamas.
See how we layered multiple pieces of Siser Glitter Heat Transfer Vinyl to create a one-of-a-kind design on a wafflecomb fabric!
You Need:
Cutting Machine
Heat Press
Heat Transfer Vinyl (we used Siser Glitter)
Non-Stick Sheet
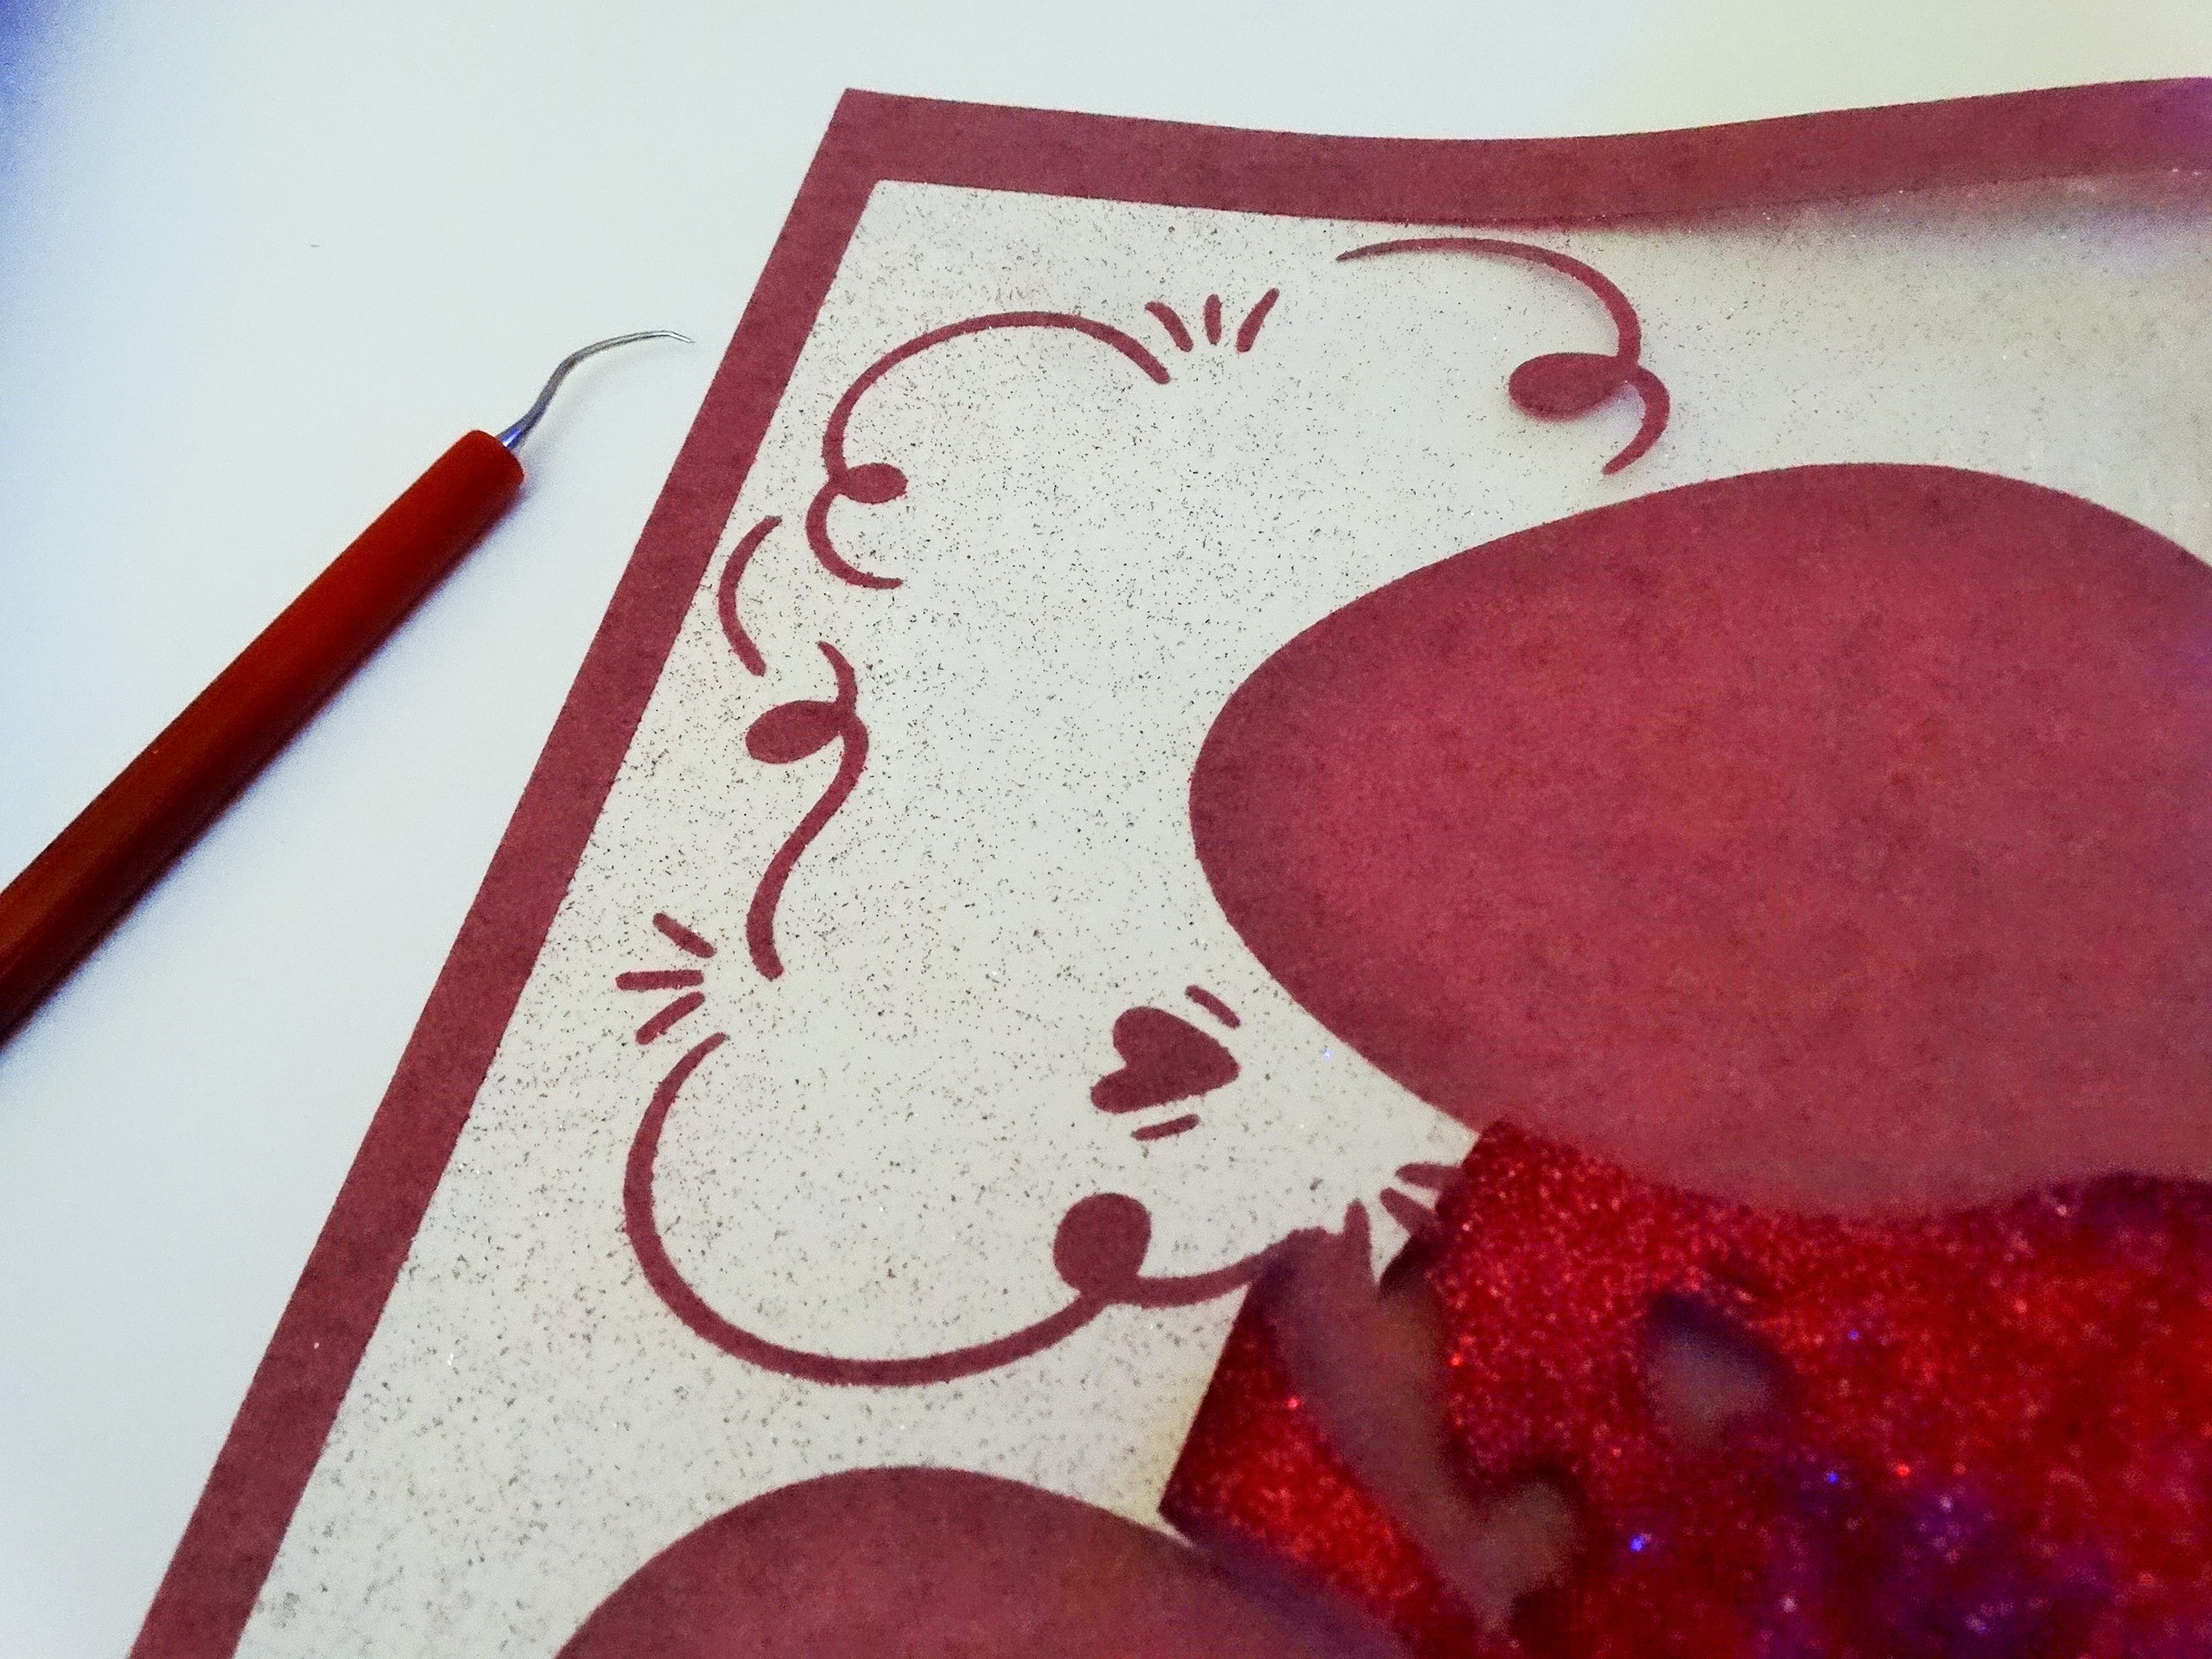
Siser Weeders
1 – Take your shirt and measure the available space.
2 – Find a design(s) and upload it into your design software. We mixed multiple images, to create our one-of-a-kind image.
Since we applied our Heat Transfer Vinyl to a wafflecomb fabric it was important to choose a thicker HTV so that the texture of the fabric did not show through the vinyl. We decided to go with Siser Glitter Heat Transfer Vinyl.
3 – Seeing that you cannot layer Siser Glitter HTV you will need to subtract your design so that it can be pieced together like a puzzle. You will notice that we subtracted the pink line from the egg shape to create an open space.
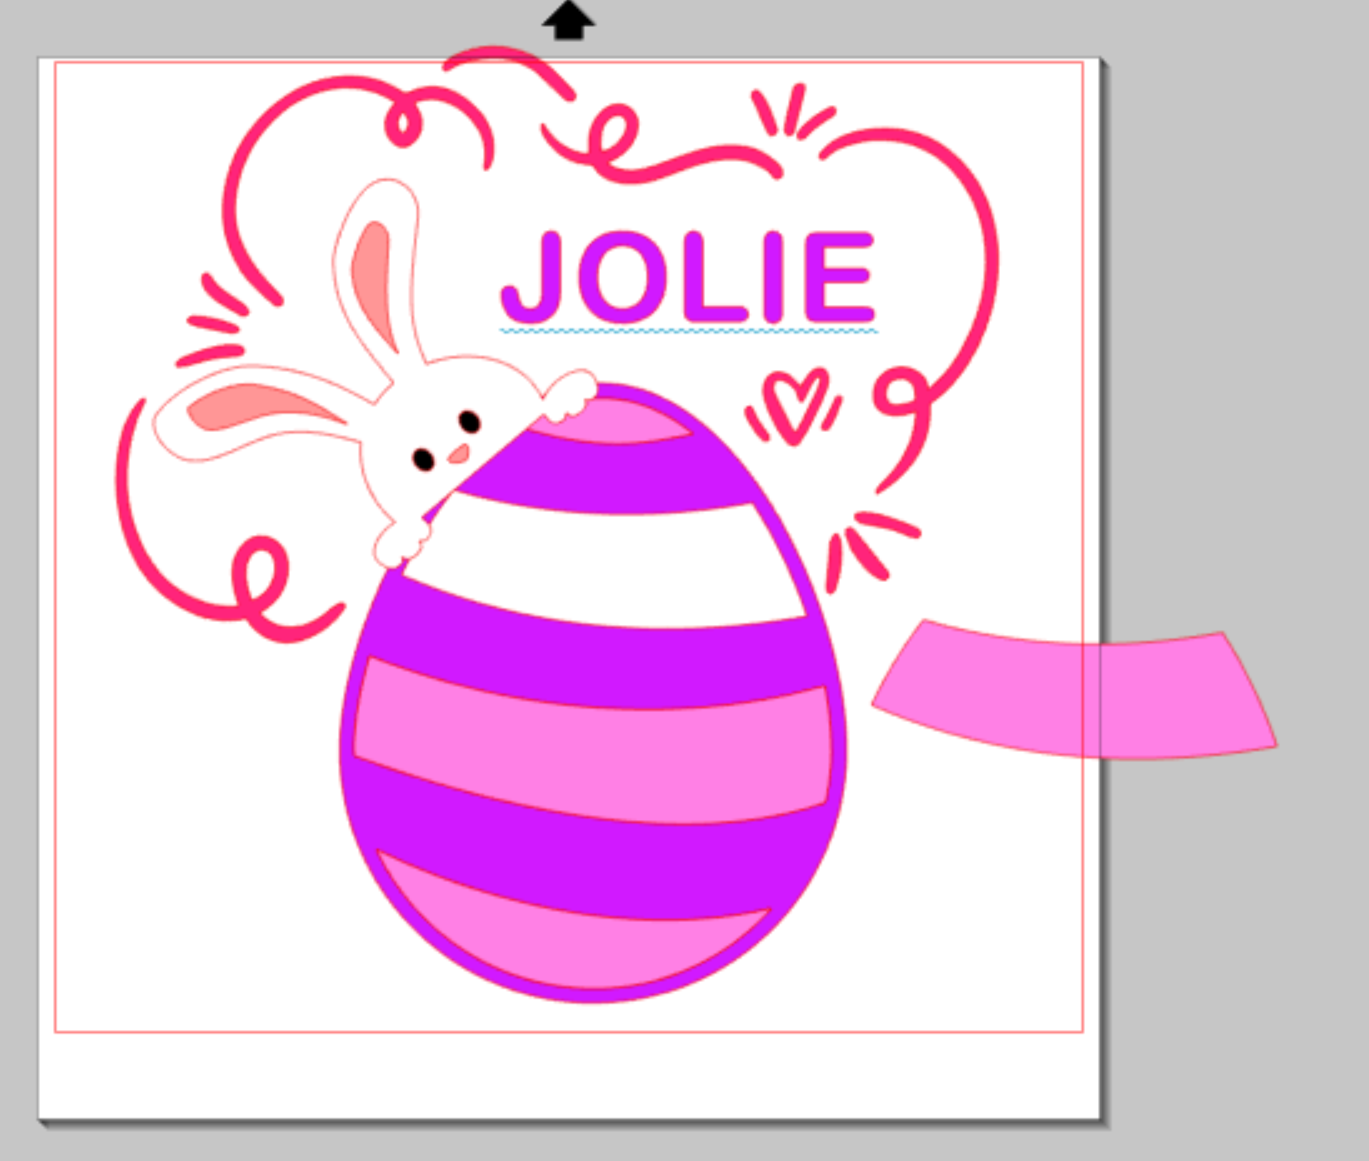
4 – Next, you will want to mirror your image.
5 – Insert your first color heat transfer vinyl into your machine.

6 – Double check your settings and click cut.
7 – Repeat steps 4 & 5 for your other heat transfer vinyl colors.
9 – Weed your design.
10 – Place it on your item and press it with your Heat Press.
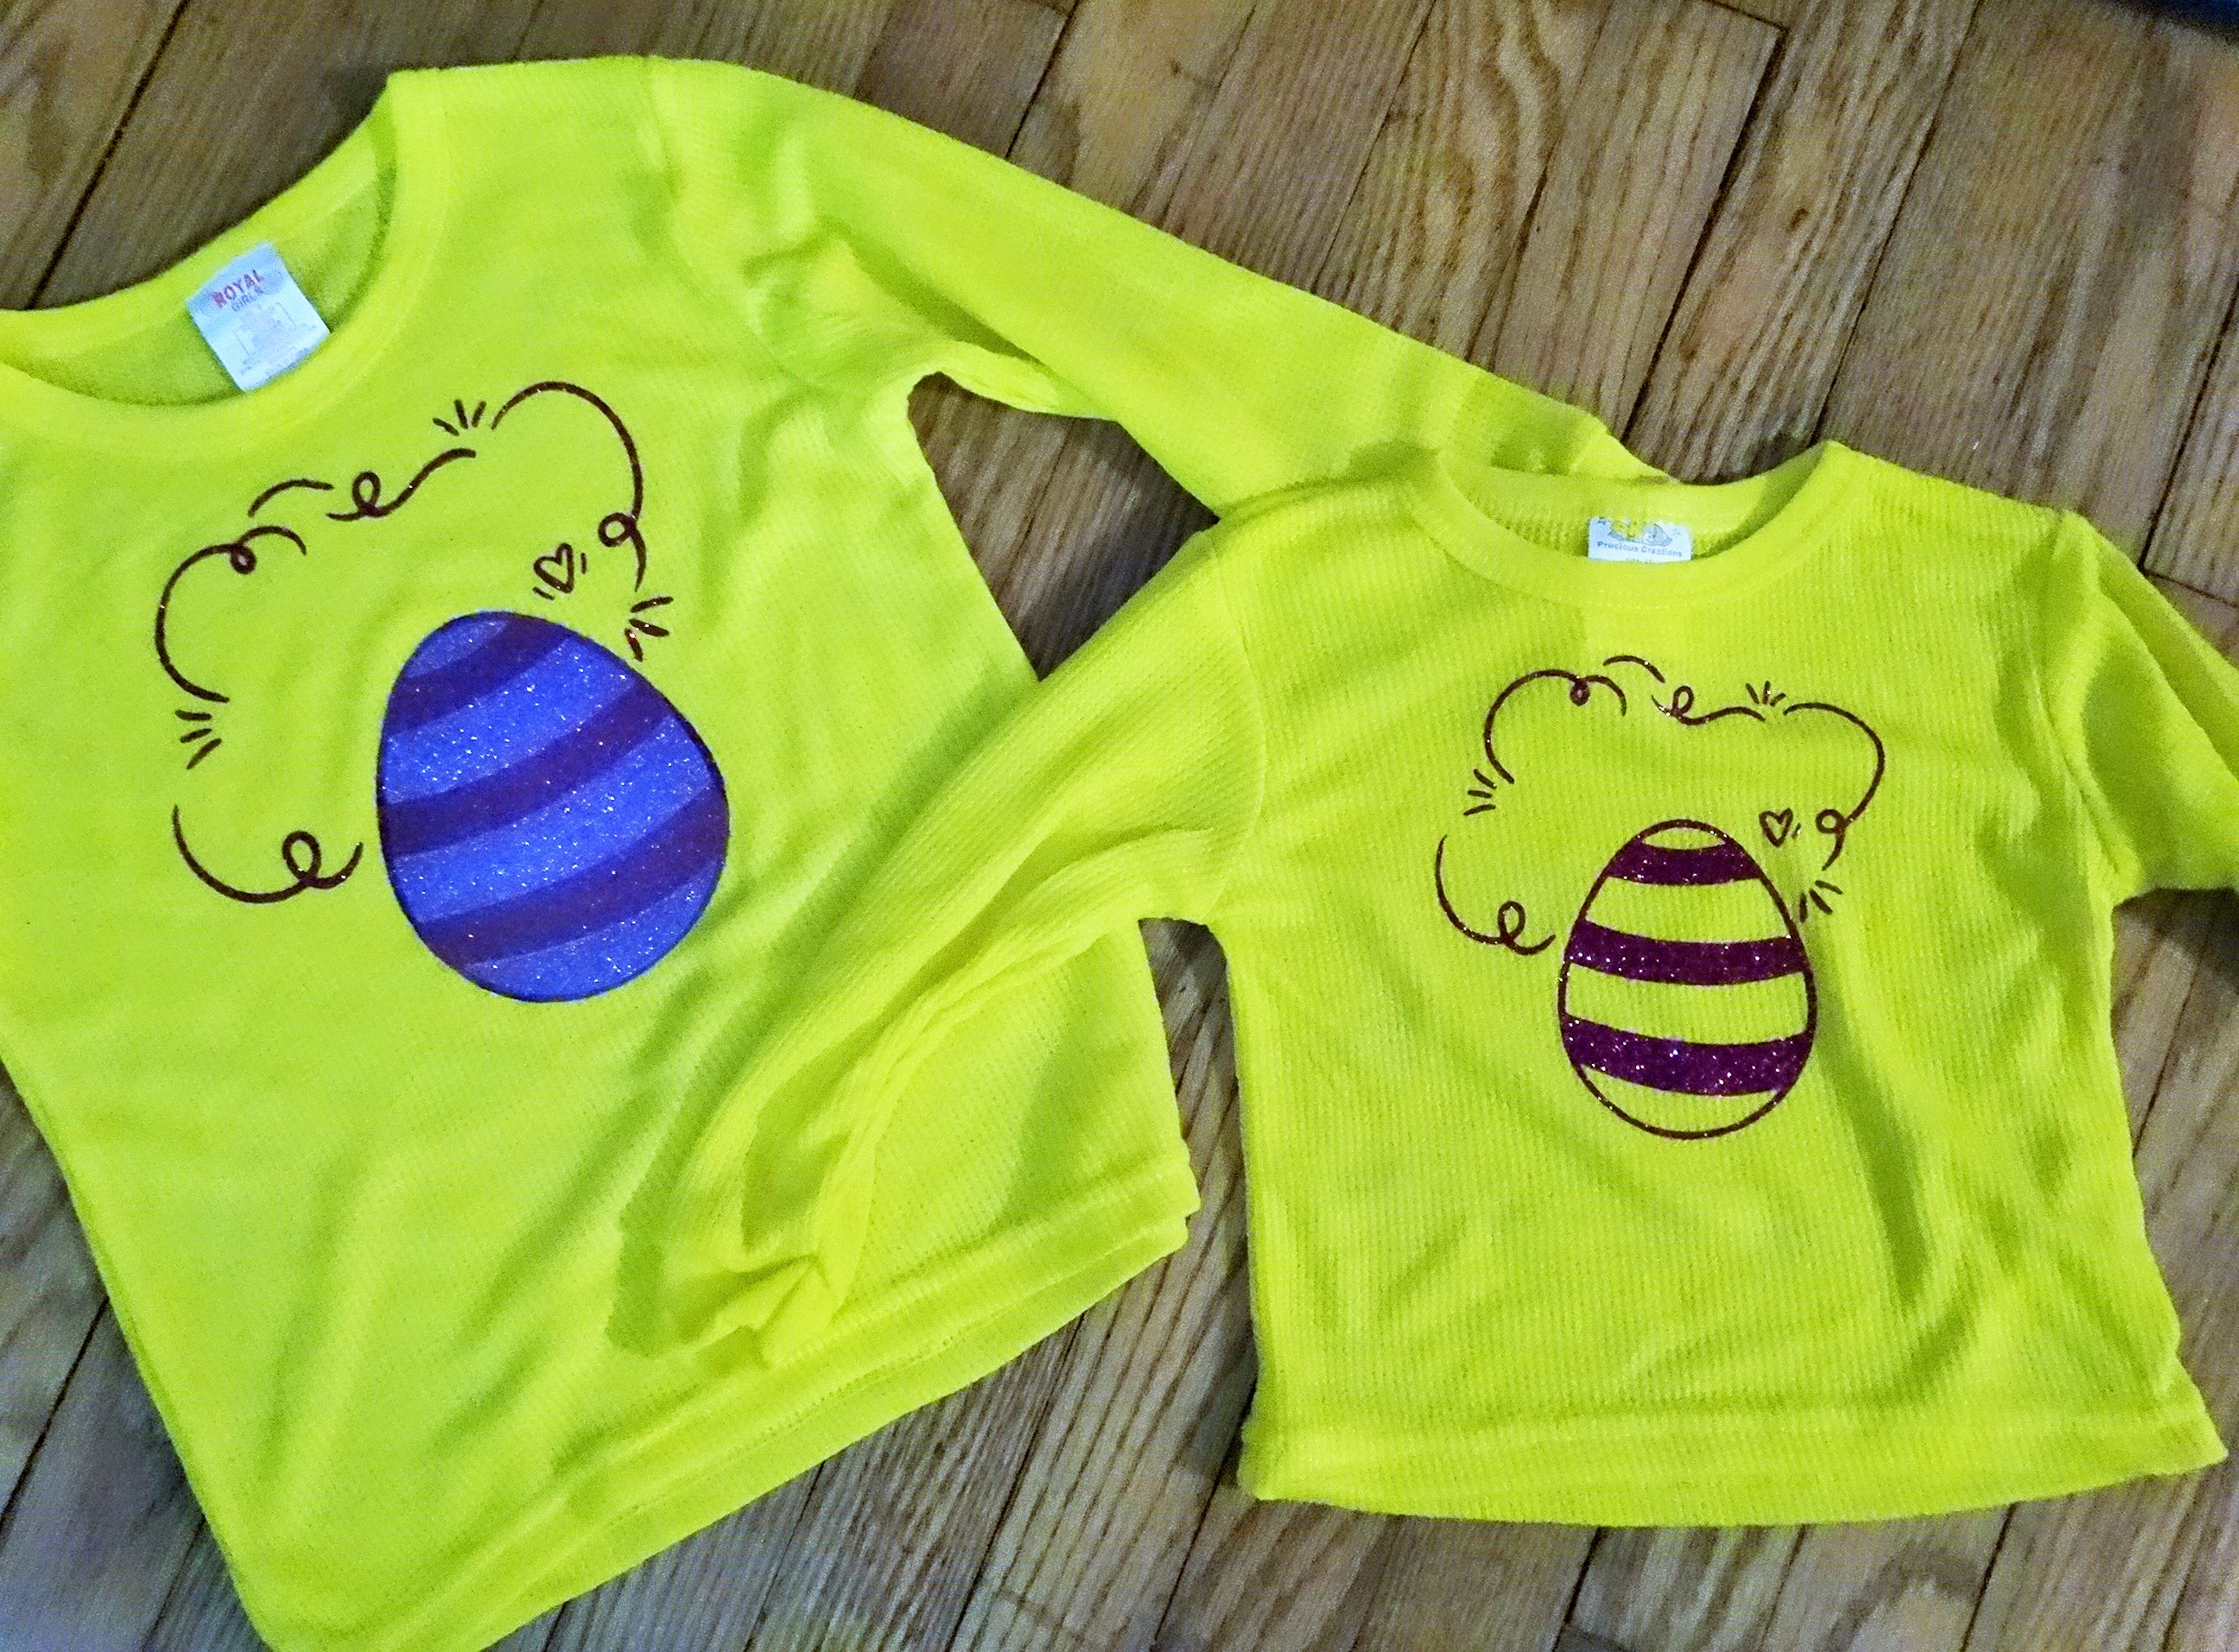
11 – Repeat step 10 until you’ve pressed all of your layers. Remember to keep your HTV covered from the pressing plates if you’ve removed the clear protective barrier. You can do this by laying your non-stick sheet over top of the vinyl.
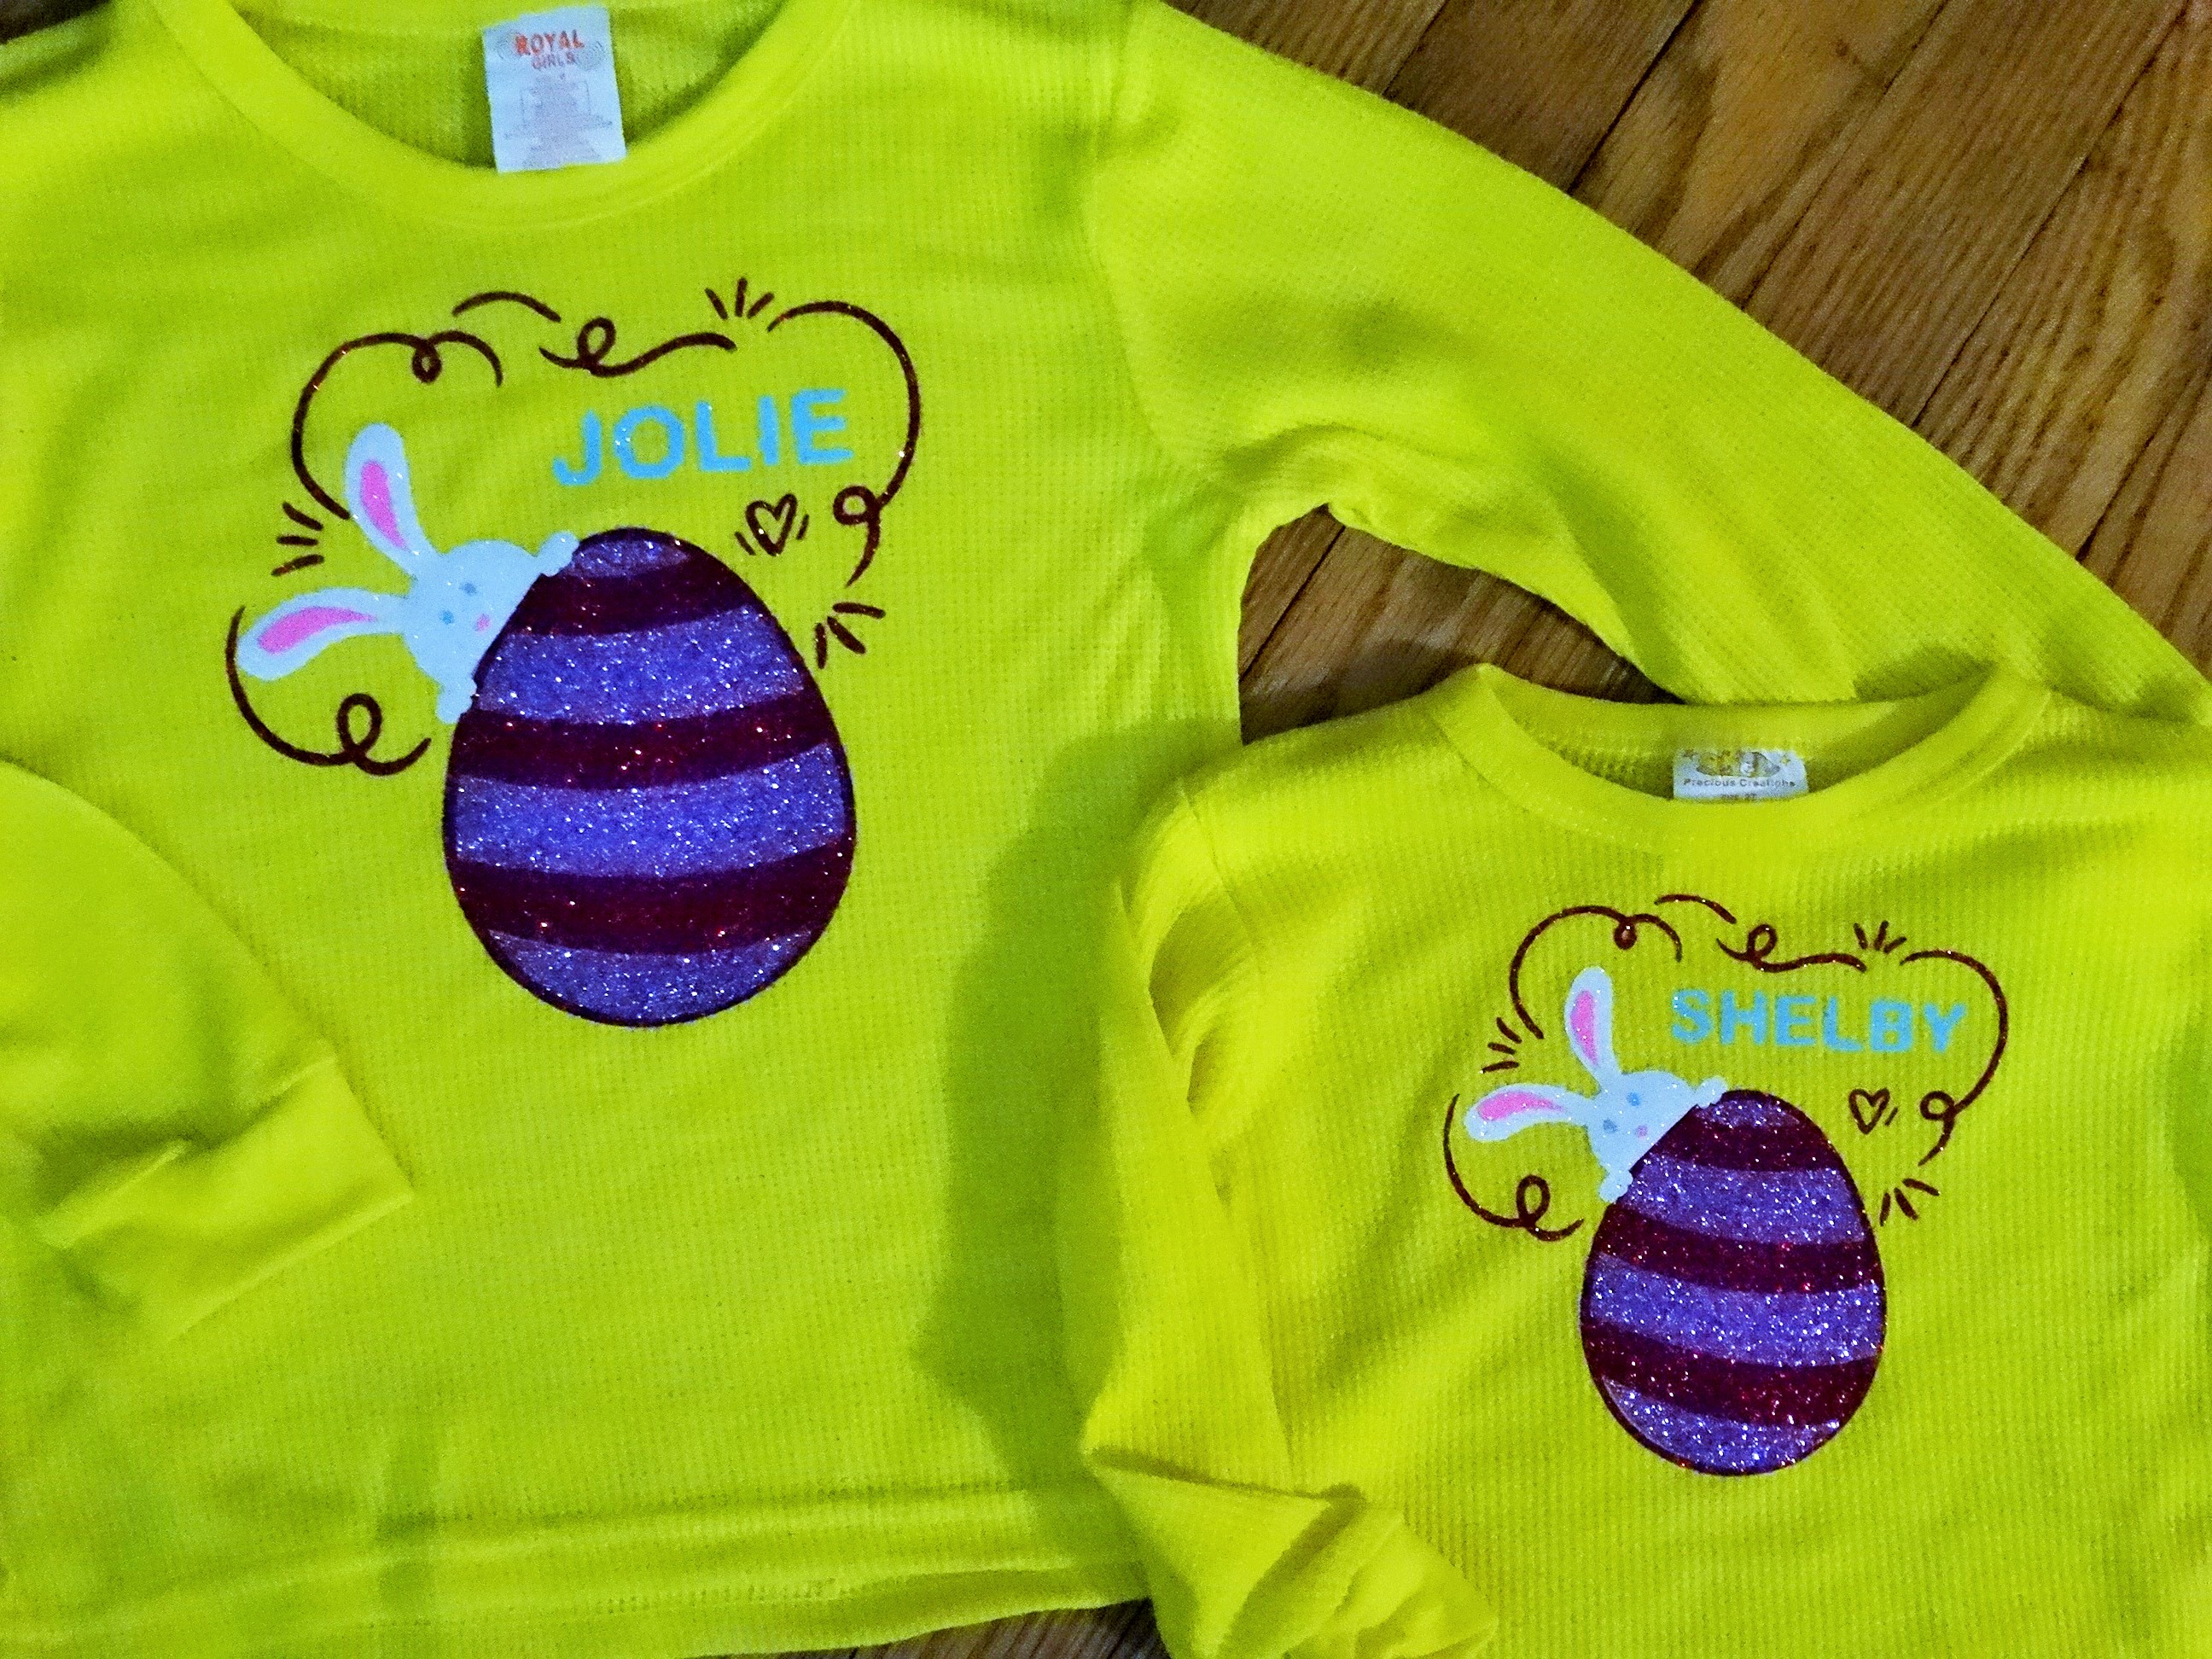
12 – Admire your work!