Clamshell vs Swing Away Heat Presses

clamshell vs swing away heat presses: which one should you get

Are you in the market for a new (or your first) heat press?? You came to the right place! Pro World carries a broad selection of TransPro heat presses- many of which are eligible for our $200 off deal!*

*If you purchase at least $399 in stock transfers, transfer paper, heat transfer vinyl, sublimation paper, sublimation blanks, and Silhouette products (excluding cutters & custom transfers), a $200 discount will automatically be applied to your cart.

But first, do you even need a heat press? Can’t you just use an iron or handheld heat press?

In some situations, yes. However, a heat press gives you the pressure consistency, temperature control, and larger work area necessary for most projects. Additionally, if you have a steam iron, the holes on the bottom will affect the amount of pressure being applied. Your transfer won’t be receiving any pressure in the areas where the holes are.

So if you have a t-shirt business (or are thinking about opening one), using a heat press will allow you to create MORE shirts in way LESS time. Plus, you’ll be able to feel confident in the quality of your shirts!

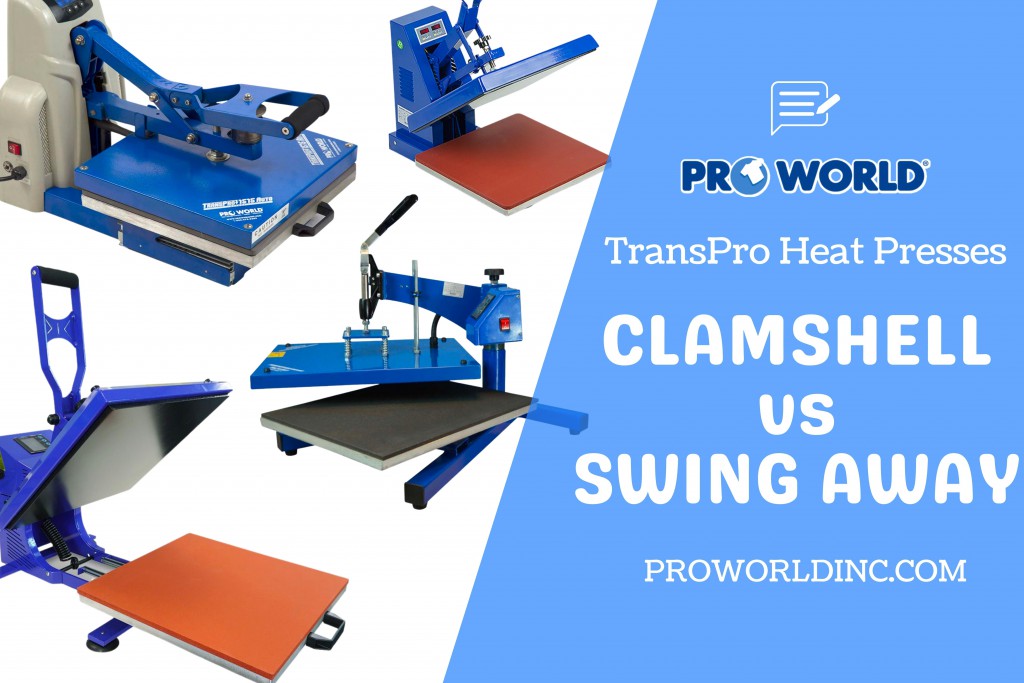
Clamshell vs. Swing Away Heat Presses

We carry two different styles of heat presses: Clamshell & Swing Away. While the design may differ, one isn’t necessarily better than the other. When trying to decide between the two styles, keep in mind the type of substrates or garments you’ll be working with, as well as how much space you have available in your work area.

clamshell heat press vs swing away heat press

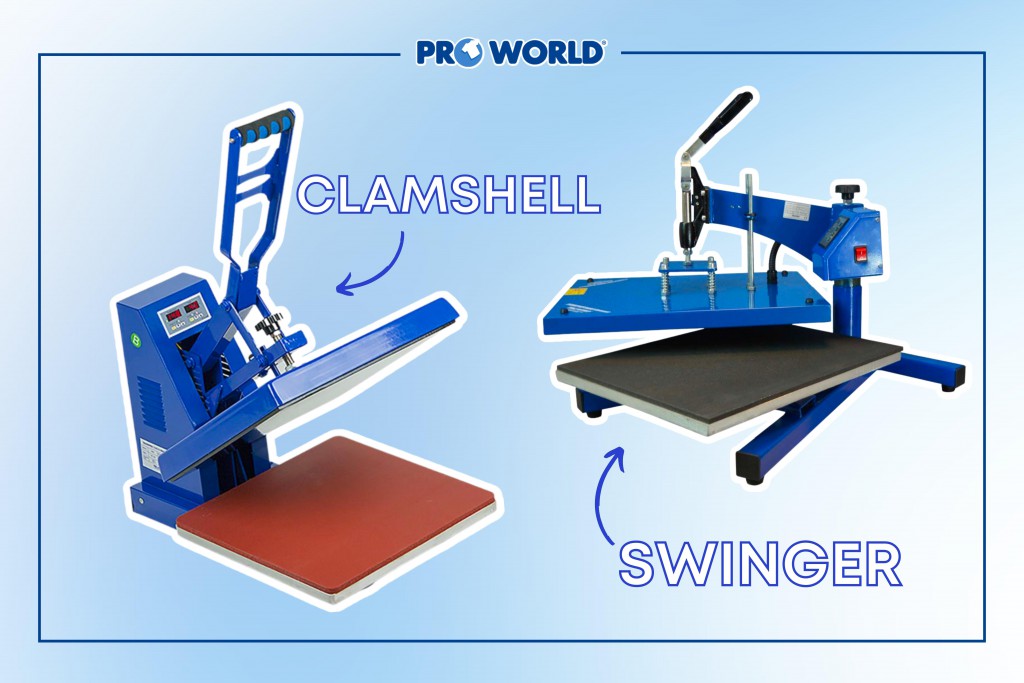
Clamshell Heat Presses

Clamshell heat presses open and close just like a clam. They have a smaller footprint of the two styles and also tend to be the more affordable option. They’re great for beginners because the design and set up are so simple.

Swing Away Heat Presses

Swing away heat presses have a top platen that lifts and swings completely away from the lower platen. This makes it easier to lay out your garment or substrate without the risk of burning yourself.

The design of swing away heat presses also makes them more conducive to working with thicker items, such as plaques and tiles. This is because the top platen comes down straight and can apply pressure evenly.

Swing away heat presses require more space than a clamshell style. You’ll need to make sure there’s enough room on either side of the machine to swing the top platen.

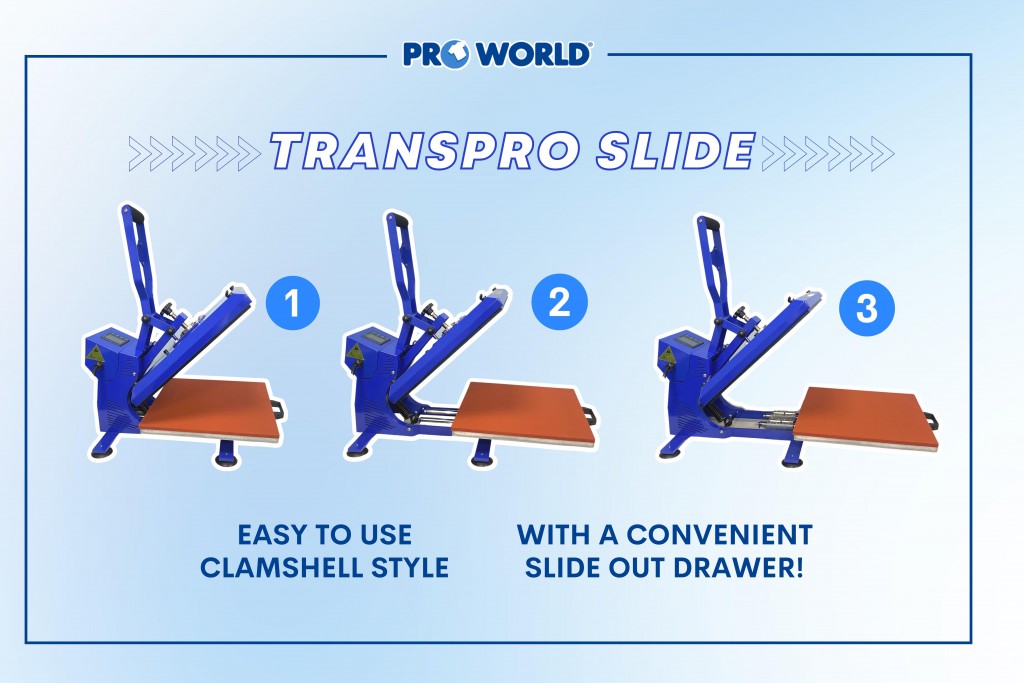
The TransPro Slide: The Best of Both Worlds!

If you love the affordability and size of a clamshell heat press but also want the ease of laying out your garments safely away from the heat, you may want to consider our TransPro Slide heat press!

The TransPro Slide is a clamshell style, but the lower platen slides out like a drawer. This gives you plenty of space to lay out your garment without having to get too close to the heat.

clamshell style heat press with slide out drawer

Whichever TransPro style you choose, you can feel confident that you’ll be getting a quality heat press at an unbeatable price! Check out all of the TransPro Heat Presses here and don’t forget about our $200 off special!!

View & Add Comments

Tips for Applying Adhesive Vinyl

Have you heard of the wet application technique for adhesive vinyl? If you’ve ever had a vinyl project ruined by those annoying air bubbles, you’re going to want to save this post!

tips for applying adhesive vinyl

When should you use this application technique?

This method is helpful when you’re applying adhesive vinyl to any type of hard, non-porous surface (plastic, metal, glass, etc). With these types of surfaces, air bubbles are a common occurrence. But when you apply using water, you’re able to easily push the air bubbles out- leaving you with a smooth finished product!

tips for applying adhesive vinyl

Here’s what you need:

  • Cut vinyl design (we’re using Siser Easy PSV in the color “Coral Reef”)
  • Surface you’re applying it to
  • Spray bottle with water + a drop of dish soap
  • Squeegee tool
  • Transfer tape
  • Paper towel or rag

Applying your vinyl:

how to apply adhesive vinyl

The first step is applying transfer tape to your design, just like you normally would.

TIP: If you’re having trouble getting your design to stick to the transfer tape, try turning it over and burnishing on the back side!

Once your design is secured to the transfer tape, use your spray bottle to lightly spray water onto the surface you’re decorating. If you have a larger design, you can also apply a little bit of water to the back of your vinyl.

how to apply adhesive vinyl

Place your design where you want it (the water will allow you to more easily reposition if needed). Use your squeegee to push out the water and any air bubbles.

how to apply adhesive vinyl

Repeat this process with your squeegee until it looks like most of the water is gone. Use a paper towel to wipe away any water you squeegee out.

how to apply adhesive vinyl

Carefully peel the transfer tape away from your design and dry any remaining drops of water. Lastly, allow your project 24-48 hours for the adhesive to fully cure (this step applies even if you don’t use this method).

Are you going to try this method?? Let us know how it works out for you!


View & Add Comments

How and Why You Should Use Heat Press Pillows

Whether you work with heat transfer vinyl or sublimation, our heat press pillows are the key to helping you consistently achieve professional looking results!

when and how to use heat press pillows

What are heat press pillows?

If you don’t know what heat press pillows are, they’re soft foam squares or rectangles that are covered with teflon. These foam pillows go inside or under garments, causing thick seams, zippers, buttons, etc to be pressed down into the pillow. This eliminates pressure points, allowing pressure to be evenly distributed across your garment.

Four different sizes: 6"x6", 5"x16", 10"x10", & 15"x15"

Four different sizes: 6″x6″, 5″x16″, 10″x10″, & 15″x15″

Have you ever ended up with paper indentations on your garment after pressing a sublimated design?? Pressing pillows can help with this! Try using a pillow that is smaller than your transfer paper, but larger than your design. This will prevent the edges of the paper from touching your garment and ensure you’ll have no indentations.

If I were applying a smaller logo to the left chest area of this shirt, I would use the 6"x6" pillow to make sure the seams along the sleeve don't interfere

If I were applying a smaller logo to the left chest area of this shirt, I would use the 6″x6″ pillow to make sure the seams along the sleeve don’t interfere

When applying heat transfer vinyl; zippers, buttons, and thick seams can stop your top platen from fully reaching the area where you want to apply your vinyl. If this happens, your vinyl might not receive the amount of pressure it needs to properly bond to your garment.

The 10"x10" size would be perfect for applying a larger design onto this tote bag

The 10″x10″ size would be perfect for applying a larger design onto this tote bag

how-to-heat-press-shirts

In this case, place the pressing pillow under or inside your garment before using your heat press. This will raise the area where you want to place your design, allowing your vinyl design to get the right amount of even pressure.

heat-press-pillows

If you’re ready to find out how heat press pillows can benefit you and your business, head over to our website where you can purchase your own pack!

View & Add Comments